
We are on the eve of another QGIS release. Version 3.6 will be released any day now. This will mark an important milestone in QGIS development. QGIS 3.4 will become the first long-term release for the 3.x line. With 3.6 will come one specific change pertinent to this topic: the Raster Image Marker. Consider this post a small preview of what you can expect with v3.6!In the typical CHM workshop attendees are shown how to use Fulcrum to download data collection points. These include photos. It is also possible to quickly and easily map any geotagged photo from your smartphone using just QGIS. For this example, I am using some photos I took yesterday during a hike with my iPhone.
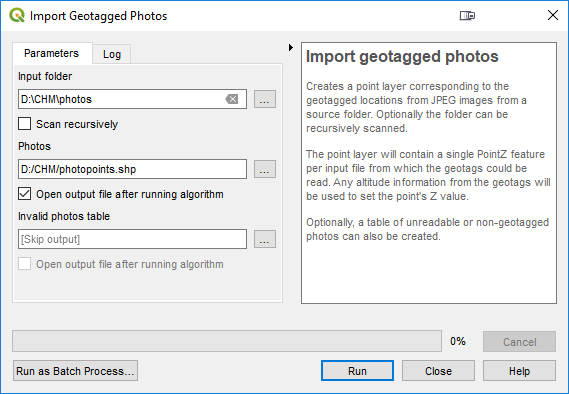
- Using the Processing Toolbox, search for and open the Import Geotagged Photos tool and set it up as shown in below, pointing the tool to the folder containing your photos and naming the output point file.
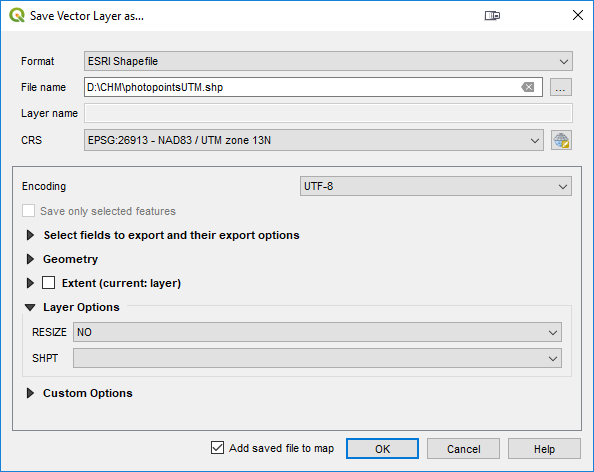
- The data are in geographic coordinates (latitude and longitude). It will be helpful to project the photopoints to a Cartesian coordinate system such as UTM or State Plane. To do this right-click on the photopoints layer in the Layers Panel and choose Export --> Save As from the context menu.
- In the Save Vector Layer As window save a new copy of the layer. If you need help determining which coordinate system to use feel free to reach out to Kurt Menke (kurt at birdseyeviewgis.com). He is happy to help!
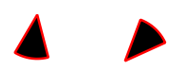
- Now you have a couple interesting ways to visualize these points. First you can generate something called a Wedge Buffer. These are pie shaped polygons that you can set up to represent the field-of-view of the photograph.
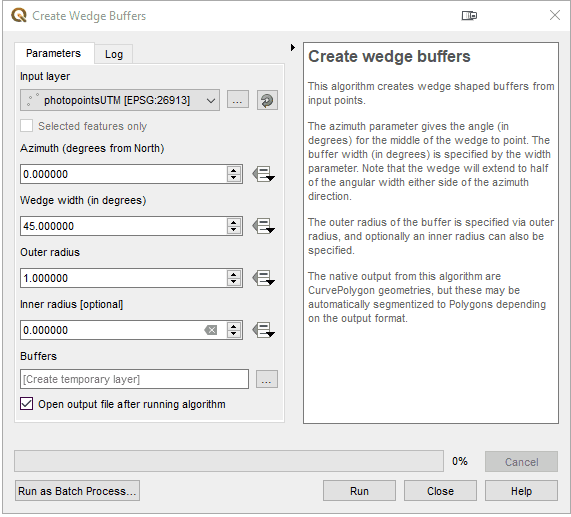
- Search the Processing Toolbox for the Create Wedge Buffers tool. The Input Layer will be the reprojected photopoints. The Buffers output can be a shapefile in your photos folder. The real trick is using what is known as a Data Defined Override. In QGIS you can use values in attribute columns or expressions for tool inputs instead of putting in a single typed value. In the animation below, a Data Defined Override is being used for the Azimuth parameter. This determines which way the wedge will be pointed. The Import Geotagged Photos tool extracts more than just photo location. It also extracts direction, altitude etc. Here the Azimuth parameter is simply being pointed to the direction attribute column and this orients the wedge in the direction the photo was taken! The only other parameter to set is the Outer Radius. This determines how long the wedge will be. Here it is being set to 300 meters.
- Now there are both photo locations as points, and wedge buffers showing the field-of-view!
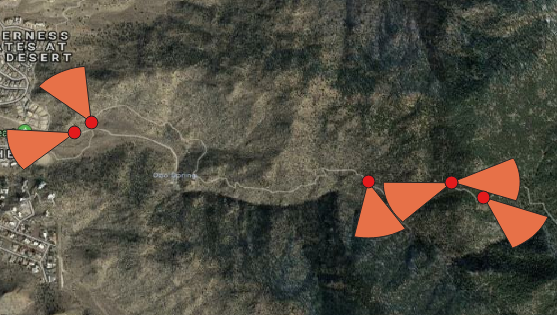
- Next let's improve the default symbology for the wedge buffers using a Shapeburst fill. You will open the Layer Styling Panel (F7) and set the wedge buffers as the target layer. Next select the Simple Fill component and switch the Symbol layer type from Simple fill to Shapeburst fill. You can then set the two colors to use. Here I am using red and transparent. You can then set a distance for the effect and play with other settings like Blur strength.

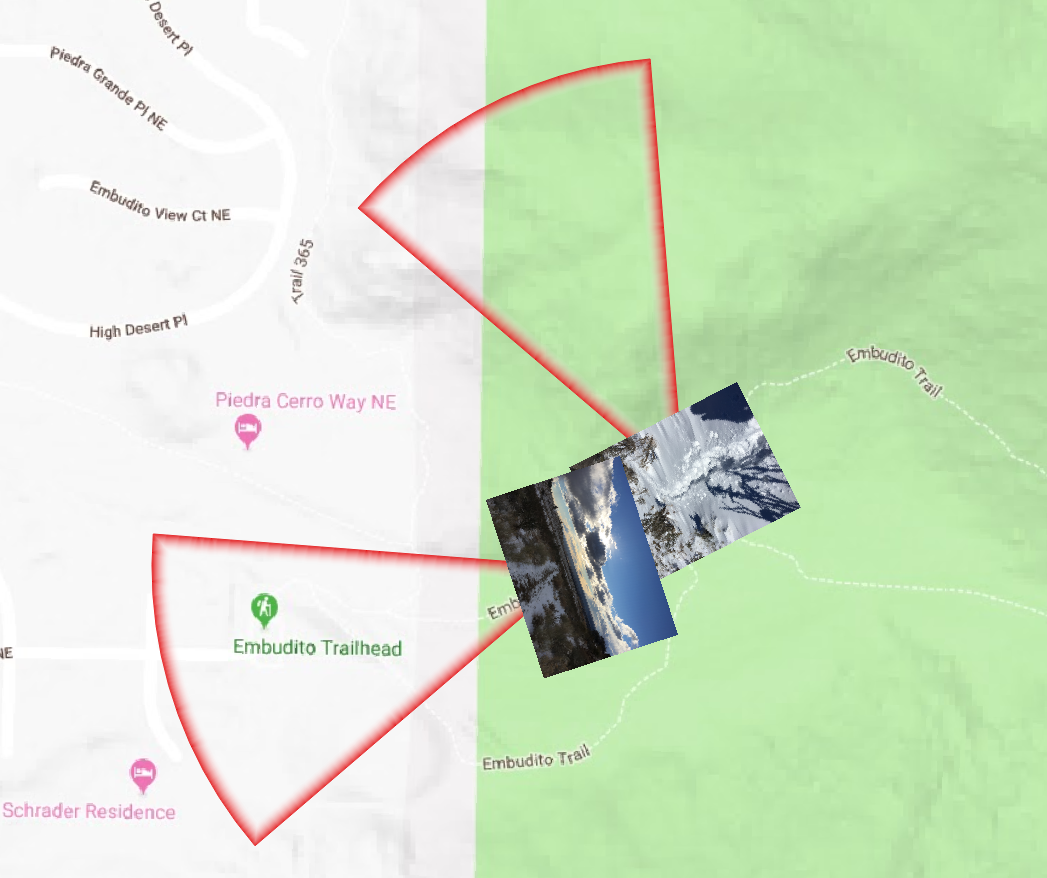
- Finally you will learn a feature that will be released with QGIS 3.6: Raster Image Markers. Here the target layer is the photopoints layer. The Symbol layer type is being switched from Simple fill to Raster image marker. Then the Data Defined Override for the image is being set to the photo field, and the Rotation parameter is being set to the rotation field!

- Now the photos have been mapped. Their field-of-view is being represented by a wedge buffer, and the photo itself is added to the map with a Raster image marker!
Stay tuned for more tips on mapping and updates about this latest QGIS release.